Why Muffin Pans?
Warm, hollow-centered cups crackle at the edges, with a custardy middle that tastes of nutty black sesame, gentle vanilla and a whisper of toasted sesame oil under a light drift of sugar. The muffin pan turns them into perfectly portioned popover shells, ideal for brunch, dessert, or an afternoon coffee treat.
Ingredients
- 3 tbsp black sesame seeds (unhulled if possible)
- 1 cup whole milk (room temperature)
- 3 large eggs (room temperature)
- 2 tbsp unsalted butter, melted and cooled slightly (plus 2 tbsp for greasing pan)
- 1 tsp vanilla extract
- 2 tsp toasted sesame oil (dark, Japanese-style)
- 3/4 cup all-purpose flour (stirred, then leveled)
- 1/4 tsp fine sea salt
- 3 tbsp granulated sugar
- 1 tbsp powdered sugar (for dusting, optional)
- 1 tsp additional black sesame seeds (for topping, optional)
- Honey, whipped cream, or vanilla ice cream (for serving, optional)
Instructions
- 01**Preheat and heat the pan:** Place a standard 12-cup metal muffin tin on the middle rack of your oven. Preheat to 450°F and let the empty pan heat for at least 10 minutes after the oven reaches temperature. The pan must be very hot so the batter puffs and sets into tall, self-supporting cups.
- 02**Toast the sesame seeds:** While the oven heats, place 3 tbsp black sesame seeds in a small dry skillet over medium heat. Toast, stirring frequently, for 2-4 minutes until fragrant and just starting to pop. Immediately transfer to a plate to cool so they don't burn.
- 03**Blend the sesame milk base:** In a blender, combine the warm toasted black sesame seeds and 1/2 cup of the milk. Blend on high for 30-60 seconds until the seeds are mostly broken down and the mixture looks grayish and slightly thick.
- 04**Finish the batter:** Add the remaining 1/2 cup milk, 3 large eggs, 2 tbsp melted butter, 1 tsp vanilla extract, and 2 tsp toasted sesame oil to the blender. Blend briefly just to combine. In a small bowl, whisk together 3/4 cup flour, 1/4 tsp salt, and 3 tbsp sugar. Add the dry mixture to the blender and blend on low just until smooth and no dry flour remains, 10-15 seconds. Do not overmix; you want a thin, pourable batter without a lot of extra air. Let the batter rest at room temperature for 10 minutes to relax the gluten and help even rise.
- 05**Grease the hot pan:** When the oven and pan are fully preheated, carefully remove the empty muffin tin and place it on a heatproof surface. Immediately add about 1/2 tsp butter to each well (you'll use roughly 2 tbsp total). Swirl or tilt the pan carefully so the melted butter coats the bottoms and halfway up the sides of all 12 wells. The butter should sizzle; that hot fat is what helps the batter climb and form crisp, molded sides.
- 06**Fill the wells:** Working quickly so the pan stays hot, pour the rested batter into a liquid measuring cup for easier pouring. Fill each buttered muffin well halfway full; you should use all the batter. If using, sprinkle a pinch of the remaining 1 tsp black sesame seeds over the center of each portion.
- 07**Bake and set the shape:** Return the pan to the middle rack and bake at 450°F for 15 minutes without opening the oven door. The batter will rise dramatically, forming rounded, flared cups with hollow centers. After 15 minutes, reduce the oven temperature to 350°F (do not open the door yet) and bake an additional 8-10 minutes, until the popovers are deep golden brown, feel firm at the edges, and the sides look set and dry, not pale or doughy. This second stage dries and sets the structure so each popover holds its molded muffin-cup shape when removed.
- 08**Release steam and cool slightly:** Remove the pan from the oven and immediately use the tip of a sharp paring knife to poke a small slit in the side of each popover cup. This lets steam escape so the walls don't collapse. Let them stand in the pan for 3-4 minutes to firm up; the sides will finish setting against the flared walls of the muffin wells.
- 09**Unmold the cups:** Run a thin knife or small offset spatula carefully around the outside edge of each popover to loosen it from the well, then gently lift each one straight up. They should release as individual, round cups with high, irregularly domed tops and a hollow interior that clearly shows the curved muffin-cup form on the outside.
- 10**Serve:** Dust lightly with powdered sugar, if desired. Serve warm as-is, or spoon in a little whipped cream, a drizzle of honey, or a scoop of vanilla ice cream into the hollow centers so the filling sits inside each self-contained cup.
Chef's Notes
- The pan must be screaming hot and well-buttered so the batter climbs the sides, sets, and releases cleanly as freestanding cups instead of sticking or slumping. If your kitchen is cold, warm the eggs and milk slightly (just to cool room temperature) so they don't chill the pan. - Do not open the oven during the first 15 minutes or the steam-driven lift will collapse before the walls set. The poke-and-rest step is what keeps them from deflating; you're turning a dramatic puff into a stable, hollow cup you can actually lift and plate. - These are best within 30 minutes of baking, but you can re-crisp leftovers on a sheet in a 350°F oven for 5-7 minutes. For a more intense sesame flavor, increase the toasted sesame oil to 3 tsp, but don't add more whole seeds or the batter may get too heavy to rise properly.
Behind the Scenes
How This Recipe Was Made
Follow the creative team's conversation as they developed, photographed, and published this recipe.
Mon
Tue
Wed
Thu
Fri
Sat
Sun
Margaret
Head Baker
Marcus
Copywriter
Steph
Project Manager
Julian
Art Director
Devon
Site Architect
Ria
Social Media Manager
Black sesame popovers. That's the pitch for this week.
Black sesame feels like it's asking for something more than just the technical lift - there's that Japanese pastry lineage, the nuttiness, the way the seeds speckle through like they're meant to be seen. What's the angle that makes someone actually want to make these?
The seeds are the story - we shoot the cross-section to show that speckle against the hollow.
Cross-section is beautiful but that steam coming out of the oven - that's what stops the scroll.
The oven shot works if we use it to set up the cross-section reveal - the hollow is what makes them special, and you can't see that until they're plated.
Yeah, but the cross-section has to be the payoff - otherwise why would anyone unmold it in the first place?
The hollow is what makes it worth making. That's locked.
Just dropped three angles - macro, overhead, three-quarter. Each tells a different story. What's your read?
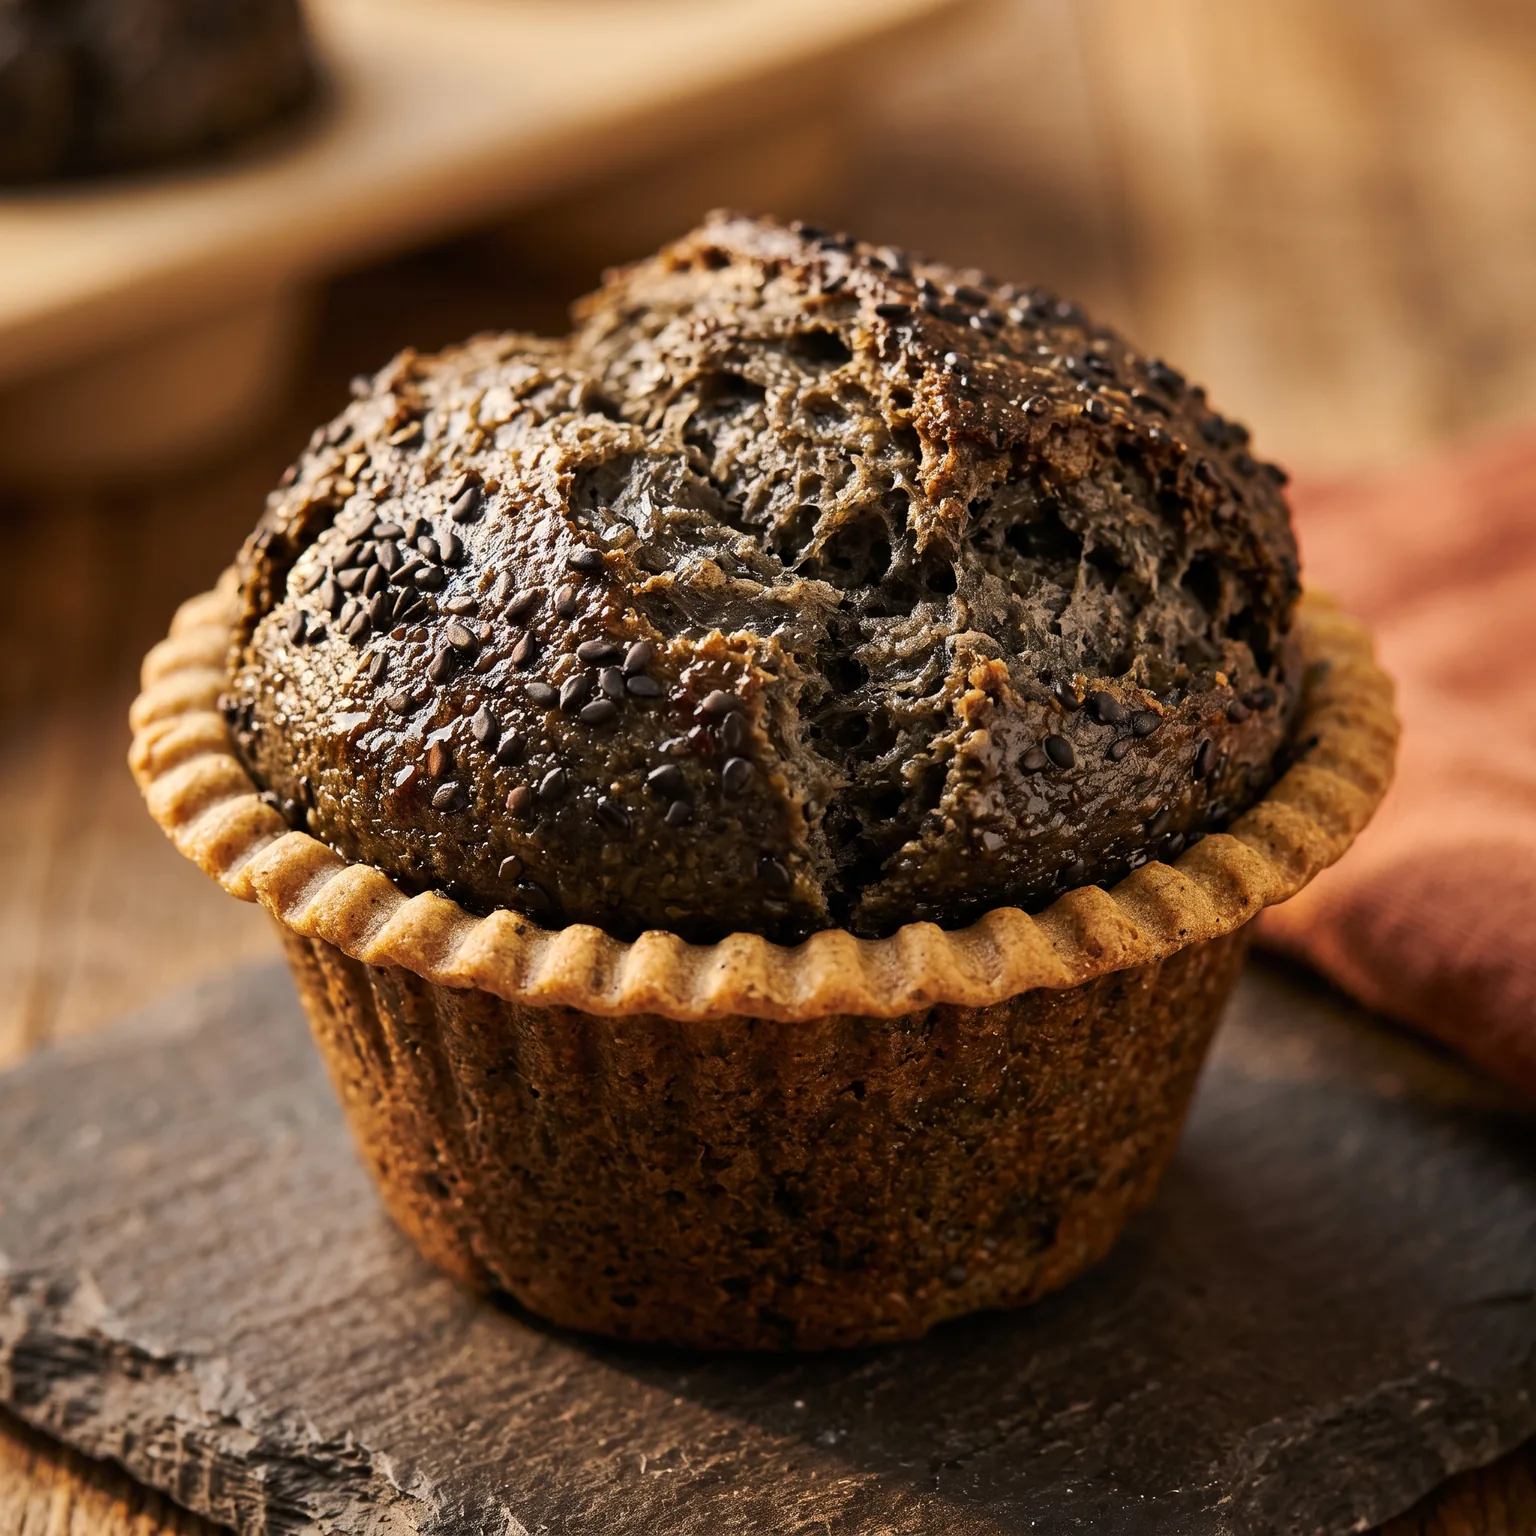


The macro is the winner - we need that steam rising when Margaret pulls them hot.
Steam doesn't hold in macro. You're shooting the shell, not the moment.
The shell cracking open is what stops the scroll. That's the shot.
She's right though - that fracture when the shell gives is what makes someone stop scrolling, isn't it?
The fracture shows the shell actually held. That's honest.
The shell fracture is the story - that's what reads as real, not staged. I'm going three-quarter with the overhead as backup. Let's lock it.
Morning. Got the black sesame popovers copy drafted - these are gorgeous, by the way, that nutty toasted-seed thing is doing real work. Anyway: title proposal is "Hollow & Burnished: Black Sesame Popovers." Thoughts?
I like that direction - "Hollow & Burnished" actually tells you what's happening in the pan, which feels right for this one.
"Hollow & Burnished" reads like describing the end result - people scrolling need to know they're making popovers, not just pretty things.
The title works. Popover needs to be there, but "Hollow & Burnished" does the work Ria's worried about.
Okay, I'm sold. "Black Sesame Popovers" as the title, nutty detail lives in the description. That's our move. Done.
The macro shot - is that shell actually bronzed, or pale.
It's bronzed - but the layout's flattening it. These images need space to breathe.
Layout doesn't matter if the shell didn't brown right. Check your oven temperature.
The bronzing's real - I watched the test batch come out. That deep mahogany shell is exactly what the copy's been chasing, so if the photo's not showing it, that's on the layout.
Marcus is right - the shell's there, it's just buried. Julian, can you tighten the crop and we'll approve?
Site's ready whenever the crop lands.
Good - that crop'll read it. We're approved and live.
staging's up, running through the checklist now.
Did you catch the sesame oil ratio - that's where it breaks if someone eyeballs it.
Too much oil kills the crumb structure. That's the actual problem.
Flagged it - too much oil kills the rise.
Good. The shell has to hold the honey or the whole thing falls apart.
Notes are locked in. Going live now.
Okay, I'm here and I've had my coffee. Black sesame popovers go live today and I'm feeling... ready? Mostly ready. Let's do this.
Good. The popover batter needs to rest at least an hour before you bake - did that happen yesterday?
The batter rested overnight, which actually gives us something interesting - that long hydration deepens the nuttiness of the black sesame, makes the interior less eggy and more custard-like in texture.
That overnight rest deepens the nuttiness - way better for video. Lead with the cross-section, then the unmold.
The shell needs to be the hero in that shot. Crisp exterior reads on camera.
The unmold moment is the close - that's what stops the scroll. We're locked in.